



Get started on Pennylane in five steps.
Your accountant has invited you to work together on Pennylane. We'll walk you through connecting your banks, importing your invoices and dealing with Extencia with a minimum of fuss.
Welcome to Pennylane.
Pennylane is a fully web-based platform, available from a computer, a tablet or a smartphone, with nothing to install. You and your accountant work in the same space, in real time.
Your accountant has invited you to work together on Pennylane. The platform brings your banks, your invoices and your accounting documents together in one place. Here's what you need to get going.
Opening your account
Accept your invitation
You'll get a welcome e-mail with a link to activate your access. Click it and accept the terms of use to set your password.
Log in
Go to the Pennylane interface and sign in with your e-mail address and your password.
Get to know the interface
The left-hand bar opens your different spaces (Transactions, Purchases, Sales, Documents…). Some items may not appear: that depends on your subscription plan and your user role (see the box below).
- Depending on the subscription plan (Collaboratif, Basique, Essentiel, Premium), some features are available and others aren't.
- The Collaboratif plan (often provided by Extencia) gives you invoice importing, bank tracking and limited creation of simple invoices.
- There are 6 user roles with different levels of access (an « employee » role, for instance, only reaches the Pro Account and Purchases).
- The details of your own plan are in the « Gestion abonnement » (Subscription management) area of your interface.
Step 01 · 3 points to check
Connect your bank accounts.
Connecting your banks is the very first thing to do. It gives you a real-time view of your cash position, tracking of your invoice payments and automatic matching between transactions and invoices.
Whether you have one account or several, connect them first so that all your money in and out comes through and your accounts stay up to date effortlessly.
Connecting your bank
Add a bank connection
From the settings, add your bank. Pennylane works through ACPR-approved providers Bridge and Powens, covering a wide range of banks.
Sync
Choose your bank and follow the connection process. Recent transactions come through automatically once the sync is live.
Check the connection
From the Transactions tab, click Comptes bancaires synchronisés (Synced bank accounts) at the top right to check the status. If recent transactions are showing, everything is working.
Your questions about connecting your bank
Step 02 · 3 points to check
Set up your invoicing tool.
Enter your company details once: they'll then appear automatically on all your quotes, invoices, purchase orders and delivery notes.
Once the editor is set up, you can produce an invoice in under a minute and get paid straight from Pennylane.
Invoicing in three moves
Set up the editor
Enter your company details and your payment details. All of it will carry over automatically onto your sales documents.
Create a quote, then an invoice
Choose the client, add your items, save. From an accepted quote, turn it into an invoice in one click.
Keep track of payments
Tick off the payments you receive and chase them up if you need to.
- How do I create and personalise an invoice?
- Producing a quote and turning it into an invoice?
- Editing an invoice after it's created? (a confirmed invoice is final → raise a credit note)
- Recurring invoicing?
- Deposit invoices and credit notes?
- E-invoicing compatibility?
Step 03 · 3 points to check
Import and send in your invoices.
Bring all your invoices and receipts together in one place. No more hunting for paperwork at the year end: Extencia can prepare your accounts calmly.
Add your documents as you go, by hand or automatically, whichever suits you. There are three broad families of method.
- I get my invoices by e-mail → forwarding to Pennylane
- I have the odd document to add → manual import
- My invoices are mostly on paper → import by photo (mobile app)
- I get a lot of invoices → automatic import
Choosing your import method
Manual import
Go to Achats › Importer une facture (Purchases › Import an invoice) — or Ventes (Sales). Click Ajouter (Add) or drag and drop the file. Pennylane reads the document and fills in the details for you: check, complete, done.
Import by photo (mobile app)
Ideal for paper and till receipts. Open the Pennylane mobile app and photograph the document: the app does the rest, all you have to do is confirm.
Automatic import — 3 methods
By forwarding e-mail — the simplest route if your invoices already land in your mailbox. In Paramètres › Transmission factures › Adresses e-mail (Settings › Sending invoices › E-mail addresses), you get 2 unique addresses (purchases / sales).
Save them once and for all in your mail contacts, under a name you will spot easily — Pennylane, for example. From then on, every invoice you receive goes across in two clicks: Forward, then Pennylane. It files itself, with no download-then-import detour.
From the cloud — automatic import of the receipts sitting on Google Drive or Dropbox, by telling it which folders to watch. Your other documents are left alone.
From your own software / Qonto — connectors to your invoicing software (Sellsy, Zoho, Axonaut, Chargebee, Harvest) to bring in your sales in real time, and to Qonto for the purchase receipts tied to your transactions.
Step 04 · 3 points to check
Working well with your accountant.
Answering Extencia's requests quickly, right inside Pennylane, makes your accounts more reliable and saves going back and forth by e-mail.
Your accountant can get in touch with you inside the tool. Here's how to answer efficiently, while keeping things running smoothly.
Good habits for working together
Answer requests for receipts
When your accountant asks for a receipt, you get a notification. Send it over in a few clicks from your transactions, with no e-mails involved.
Talk through comments and mentions
Use the comment box on a transaction or an invoice to ask a question or add a detail. Mention the person you're addressing with an @.
Send in your administrative paperwork (document library)
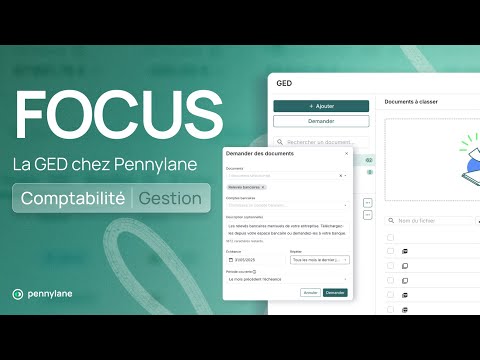
The GED (document library) is where your administrative paperwork can be requested, sent and stored, all in one place.
Keep your exchanges in one place
The collaboration centre (currently in beta) brings together everything you exchange with Extencia, so you're no longer juggling your inbox and Pennylane.
Agree how you'll work together
Take the time to agree with your accountant how you'll operate: who does what, and how often. Talking regularly keeps the relationship healthy and your accounts reliable.
Your Pennylane resources
Support
By chat from inside your interface, for anything still unresolved.
Step 05 · 3 points to check
We're here for you.
Your Extencia contact is your first point of call. You'll find your local office details at extencia.fr/implantation.
Trouble logging in, an error message? Email sos@extencia.fr.
These tools are updated regularly, so a screenshot or a step may not be perfectly up to date. If you spot a difference or a mistake, tell your Extencia contact or email us at sos@extencia.fr — we'll correct the guide.